3. Your Team
3.1 Adding Staff & Technicians
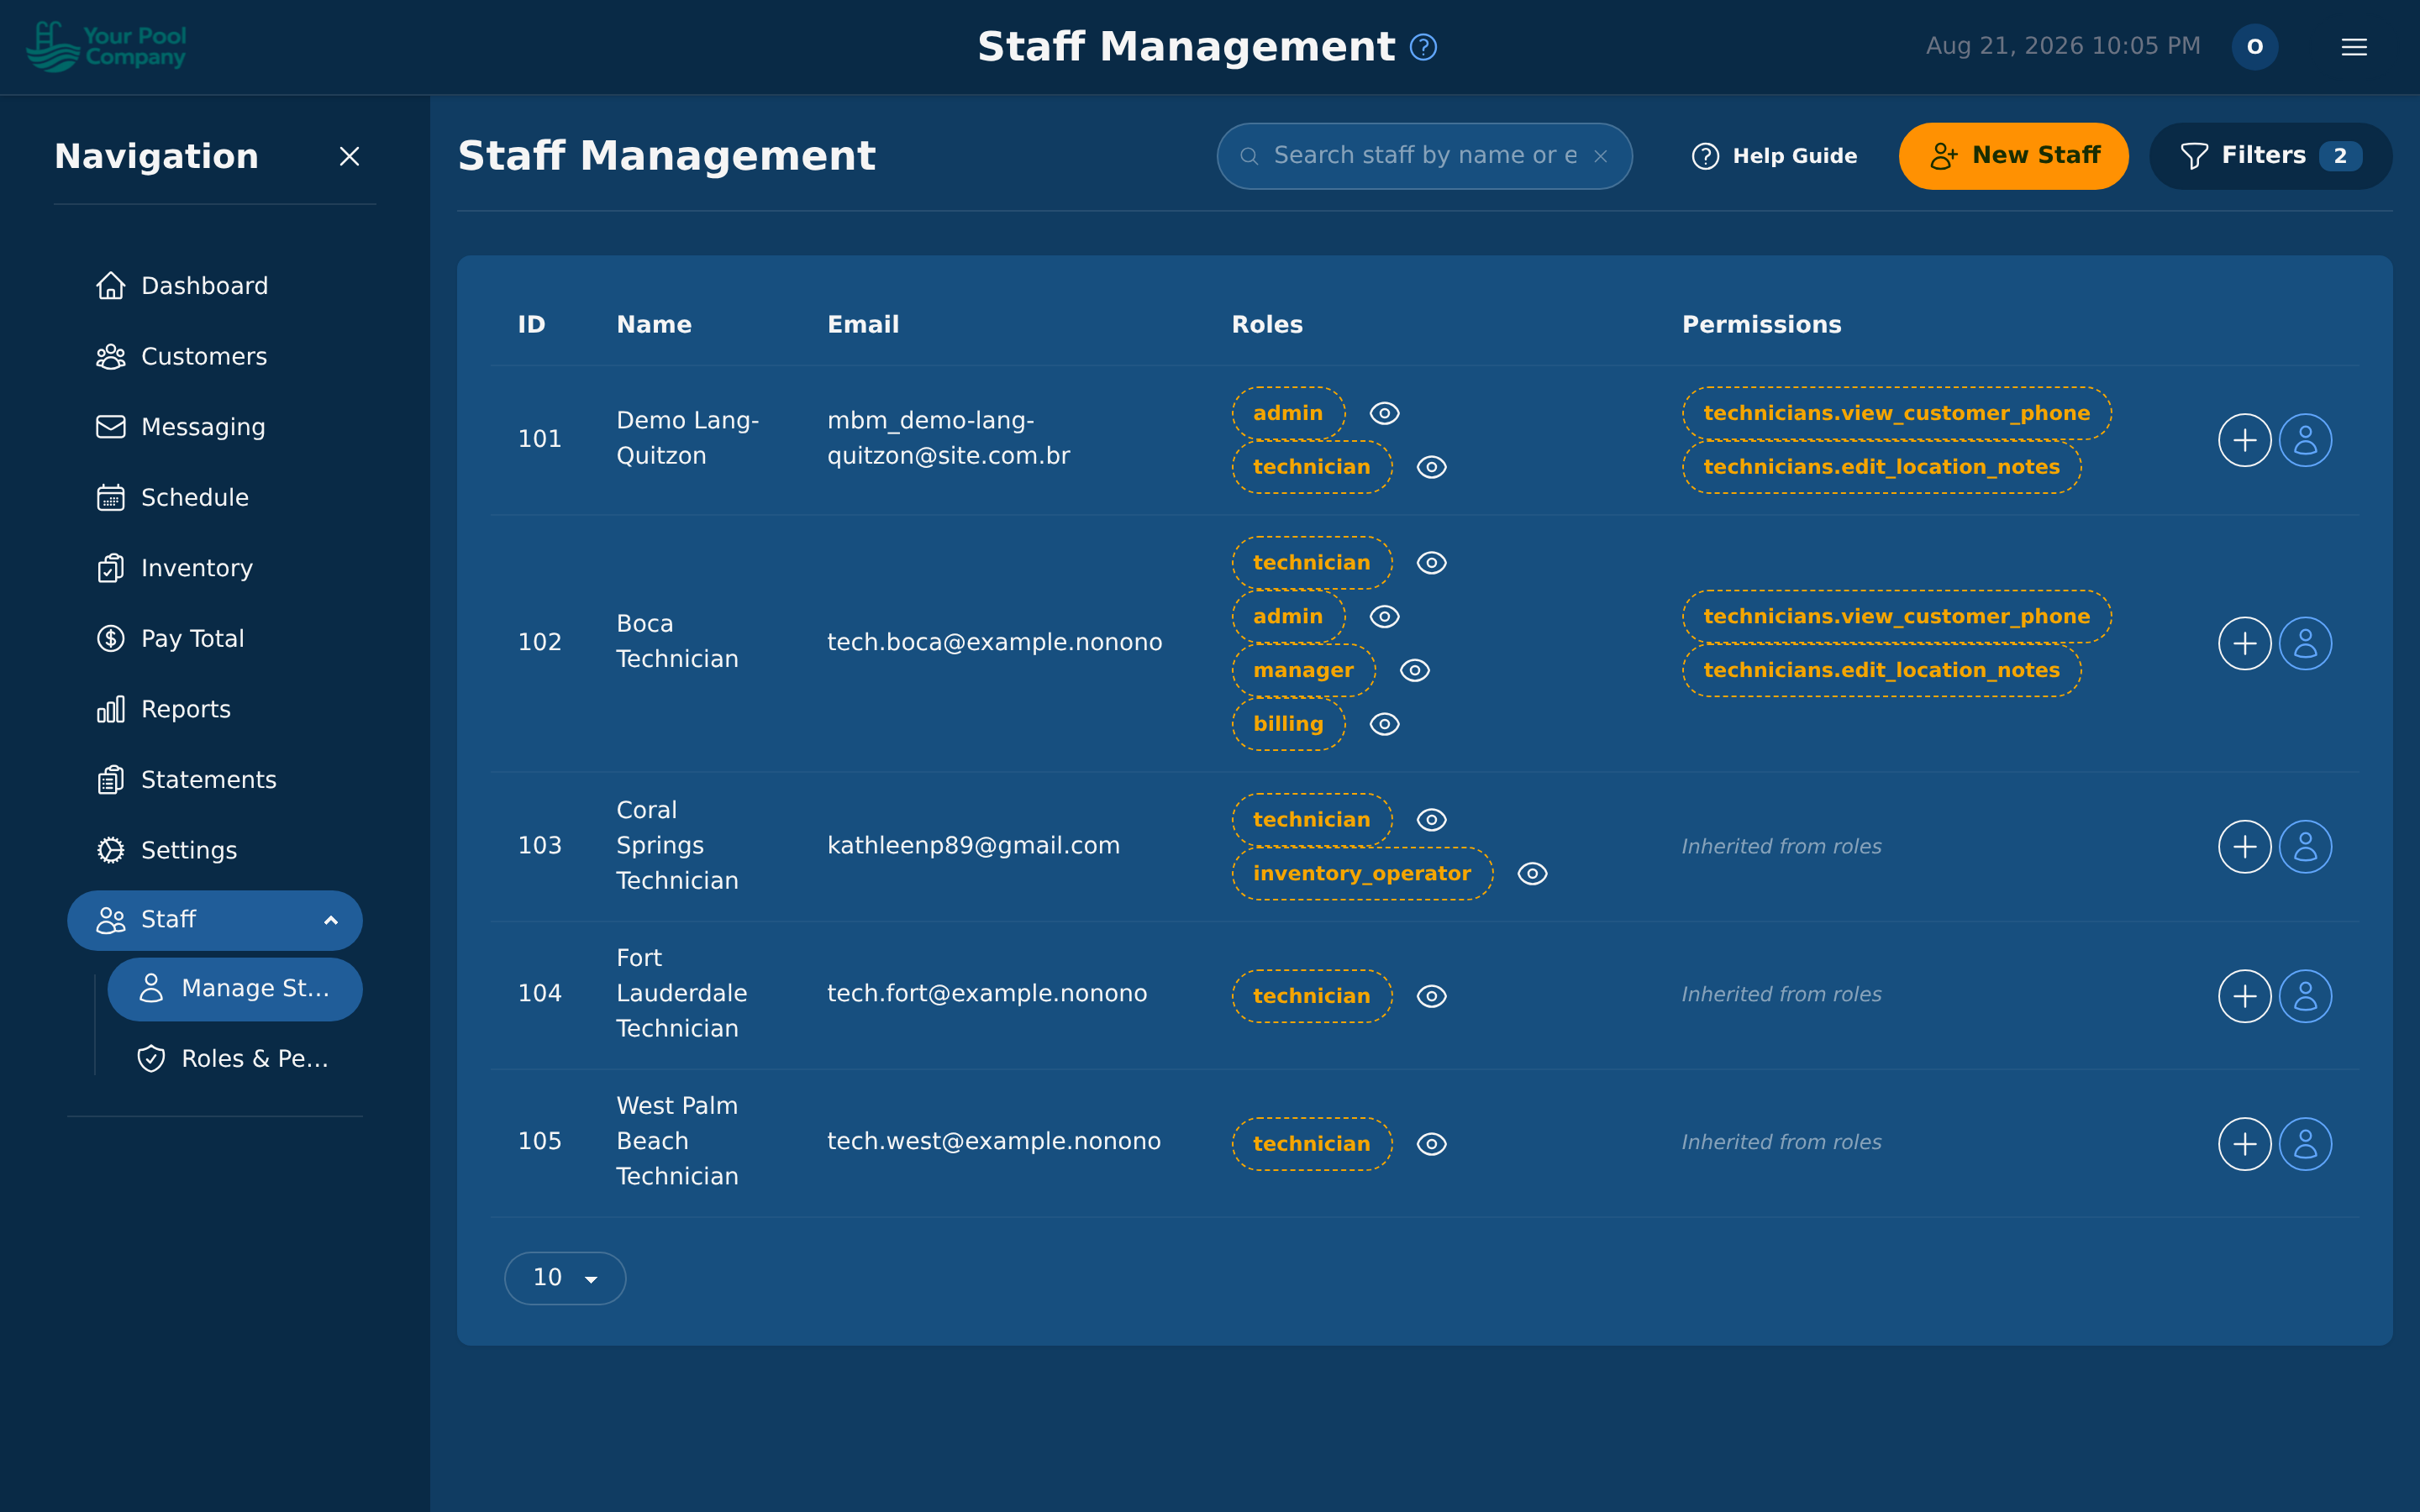
Technicians are managed under Settings > Technicians tab. Office staff and roles are managed under the Staff menu in the sidebar.
Adding a Technician:
- Go to Settings > Technicians and click Add Technician.
- Enter their name, email, and phone number.
- They'll receive an email with instructions to set up their mobile app password.
- Once they log in to the mobile app, they'll need to accept the Terms of Service.
Adding Office Staff:
- Go to Staff > Manage Staff in the sidebar.
- Click New Staff.
- Enter their name, email and a password (at least 8 characters). Let them know the password; they can change it after they first log in.
- Choose their Role (see section 3.2).
- Click Create Staff.
Someone whose roles have all been removed still appears on the list, marked No roles, so you can give them a role again or remove them.
Removing Office Staff:
- Go to Staff > Manage Staff.
- Click the red bin icon on their row, then confirm.
They can no longer log in. Their history is kept: what they did, and what they entered, stays on record.
- Removing staff needs the Manage Users permission. Admins and managers have it to start with.
- You can't remove yourself, or the account's main admin.
- Only an admin can remove another admin.
3.2 Roles & Permissions
EZ Pool Biller comes with six built-in roles that cover most pool care businesses:
| Role | Access |
|---|---|
| Admin | Full access to everything. Can manage settings, billing, staff, and all operations. |
| Manager | Operations oversight — scheduling, staff management, reports, and customer management. |
| Billing | Financial access — invoicing, payments, statements, credits/debits, and financial reports. |
| Operations | Field operations — scheduling, routing, services, and inventory management. |
| Support | Customer service — view customers, messaging, and handle day-to-day support tasks. |
| Technician | Mobile app only — sees their daily schedule, completes services, captures photos and readings. |
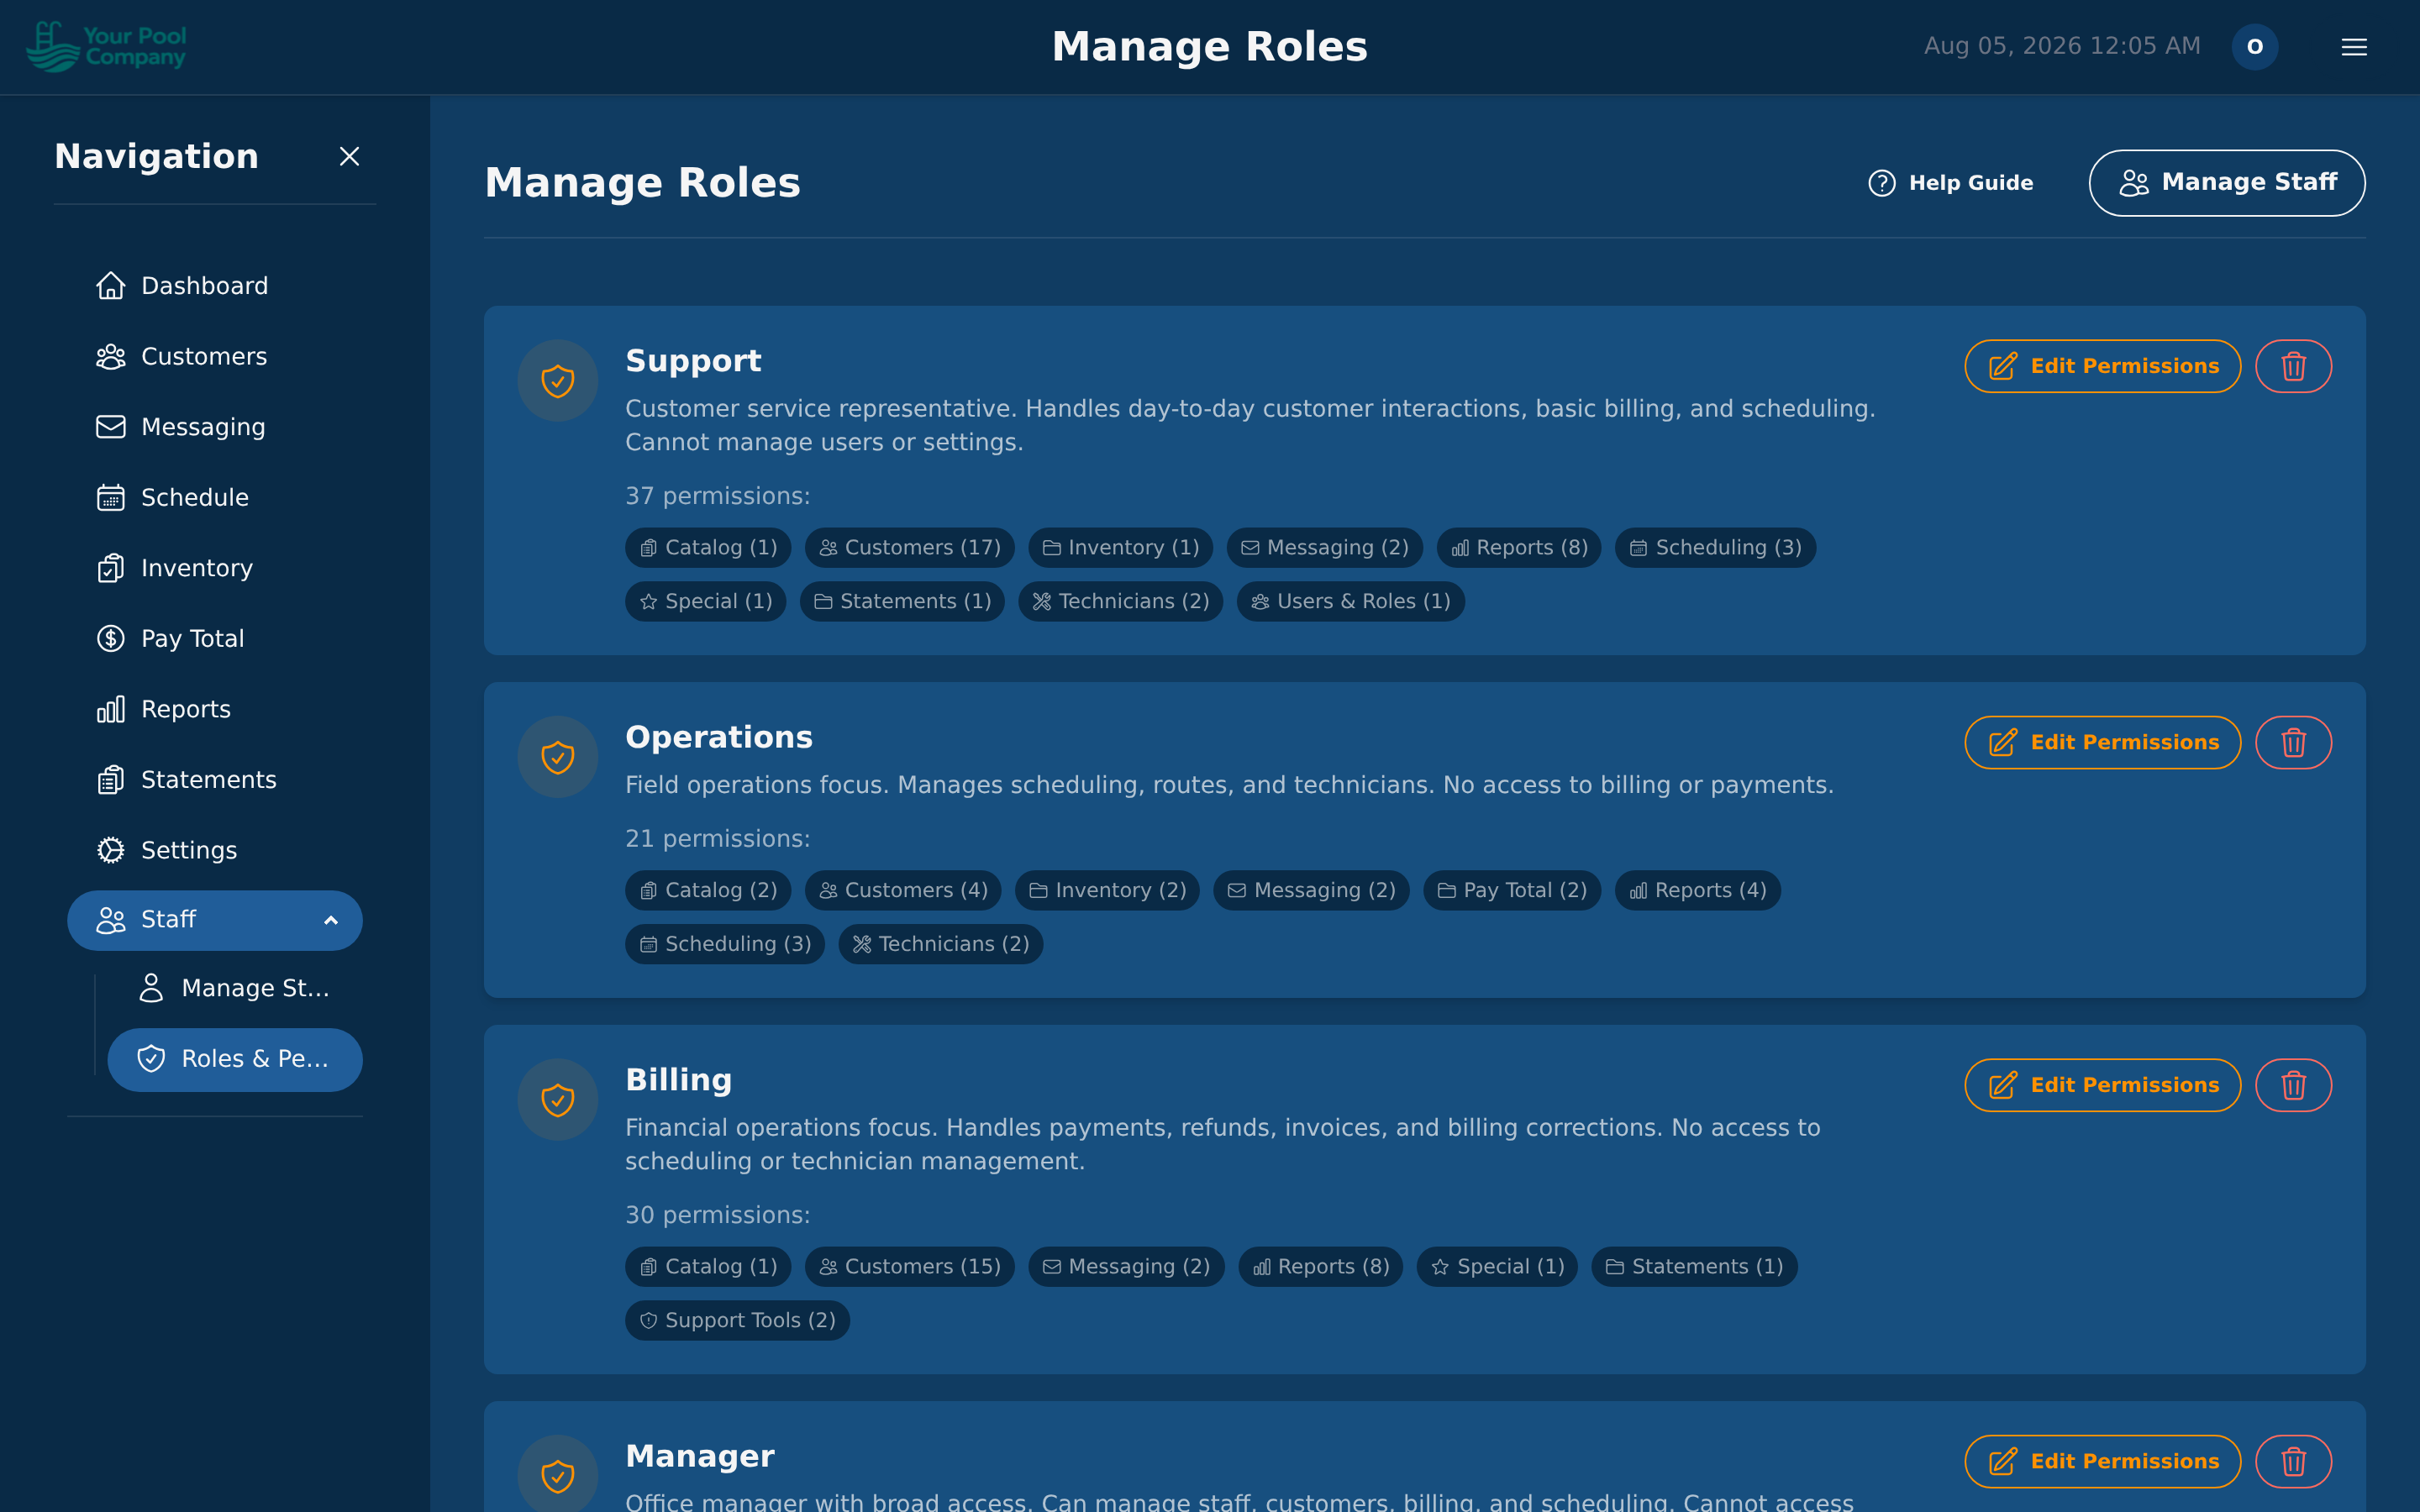
Custom roles: you can build your own with any mix of permissions. Go to Staff > Roles & Permissions.
What you can control:
- Customers — see them, add them, change them, remove them
- Billing — statements, charges, payments, credits
- Scheduling — see the calendar, change it, run the optimizer
- Inventory — see stock, change stock
- Payroll — see it, run it
- Reports — each report is granted separately
- Settings — company, payments, portal, messages, integrations
- Messaging — see messages, send messages
Look but don't touch. Charges, payments, credits and messaging each come in two strengths: one that lets someone see them, and one that lets them make them. So an office assistant can look up what a customer was charged without being able to charge them anything. Use the "view" version whenever someone needs the information but not the responsibility.
3.3 Technician Profiles & Work Schedules
Each technician has a profile that controls their scheduling and routing:
Home Base Address:
- Enter the technician's starting location (home or office). Route optimization uses this as the start and end point for their daily route.
Work Schedule (Per Weekday):
- Set start and end times for each day of the week (Monday through Sunday).
- Leave a day blank to indicate the technician is off that day.
- Set break windows (e.g., lunch from 12:00–12:30) so the optimizer respects breaks.
- Set break flexibility — how many minutes the break can shift to accommodate routing.
Capacity Limits:
- Max Jobs Per Day — prevents the optimizer from overloading a technician.
- Max Travel Distance — maximum miles the technician should drive in a day.
- Max Drive Time — maximum minutes of driving time per day.
Service Qualifications:
- Assign which Recurring Billing Items a technician is qualified to perform. The scheduler will only assign services to qualified technicians.
Color Code:
- Each technician is assigned a color that appears on the scheduling calendar and route map for easy identification.
3.4 Staff Impersonation (Support Tool)
Admins and managers can impersonate any staff member or customer to see exactly what they see. This is useful for:
- Troubleshooting — "I can't find the billing section" → impersonate them and check their permissions.
- Training — walk a new hire through the interface from their perspective.
- Customer support — see the customer portal as a specific customer sees it.
To impersonate, go to the staff or customer list and click the impersonate button next to their name. Click Stop Impersonating in the top bar to return to your own account.